The psychology behind colour
Ahhh the meaning of colour – this is a complex animal with different colours meaning different things to different people.…
More details

Share this post:
It is critical that your website is up to date with the latest information and detail on your company and products/services. This is why ensuring your website is created within an editor that doesn’t need coding knowledge to update is essential. WordPress is a fantastic tool that allows you to do just this. Here, we give you a guide on adding new pages on this platform.
To make the website as easy as possible for you to edit we have built a system that allows you to set the layout of the pages in a way that requires no coding which is called Flex Content. There are many types of layouts to choose from, whether you need the text in two / three columns or need to add images to a gallery, just select “Add Row” and you can see the layouts available to you, it’s as easy as that.
To create new pages in WordPress, first, you will need to sign into your WordPress Admin panel. If you are unsure how to access this and you are a SiteWizard client, please contact our Support team on support@sitewizard.co.uk or our support telephone number; 01622 200045.
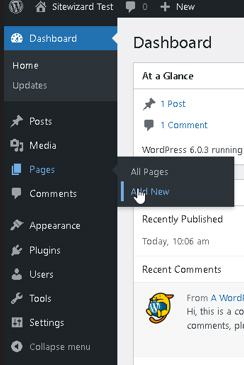
Once you are signed into the admin panel, hover your cursor over Pages and then click on Add New.
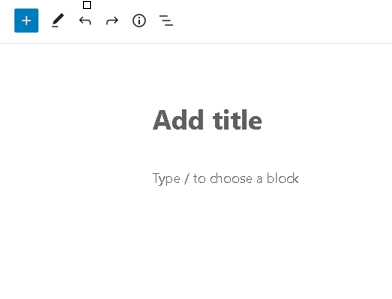
This will take you to the page editor, where you can add all the content for your new page.
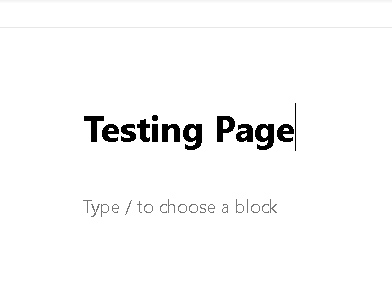
Click on the Add Title’ textbox to enter your page title. For this example, we will call our page ‘Testing Page’.
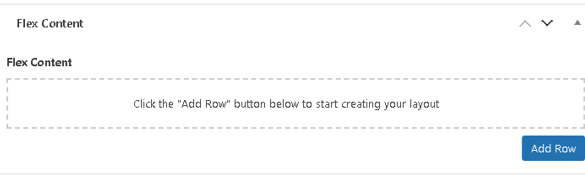
Next, we will need to add content using the Flex Content boxes. Think of these boxes as the building blocks that will make up the content of your page. Mix and match different types to make sure there is variety on the page.
Scroll down until you see the Flex Content section. Here, you can press ‘Add Row’ to add the first Flex Content box to this page.
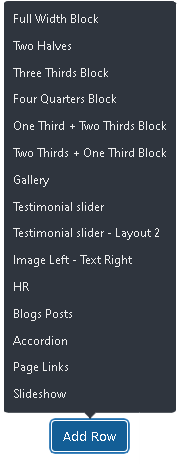
Pressing Add Row will give you a choice of how you would like to design your page layout, such as a full width block, or having multiple columns. You can use different types of blocks for different purposes, such as have one column with an image, and another column with text. For this example, we will select ’One Third + Two Third Block’.
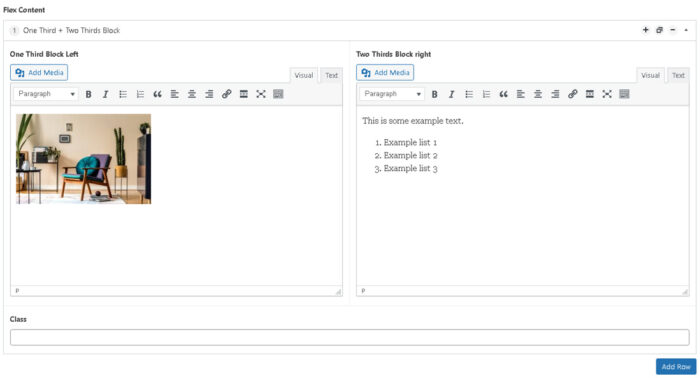
This will then give us 2 empty design windows;
You can build your page in many ways. For this example, in the left box we will add an Image, and some text in the right box. To add an image in the left box, click Add Media and then upload your image from your computer or device.
If you would like to add more content blocks, you can do so by pressing Add Row in the bottom right and add even more Flex Content Blocks.
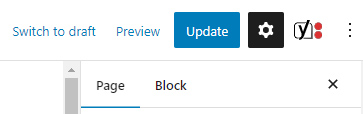
Once the content has been added to your page, you can preview the page before it is accessible to the public. Press on the Preview button in the top right to do this.
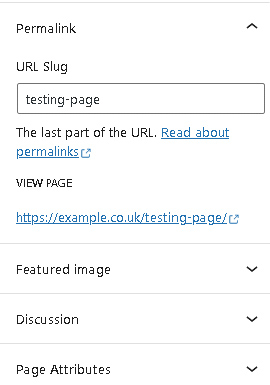
The ‘URL’ or ‘Link’ of this new page will automatically be generated based on the title you entered. To see the URL, or to add a custom link, click on Permalinks on the right hand panel.
You can enter a custom link in the URL Slug box, and this is what will appear after your domain name in the URL. The URL/Link will appear under where it says ‘View Page’, this is the link you can give to a friend or post to social media to give people access to view your new page.

Once the page is ready to be made public, press the Publish button. When this has been completed, your new page is now be live on the site.

Ahhh the meaning of colour – this is a complex animal with different colours meaning different things to different people.…
More details
When designing a website, you may get a variety of answers to the question “Who or what do I design…
More details